Smoking ribs on a gas grill is a fantastic way to achieve tender and flavorful results right in your own backyard. With the right tools and techniques, you can create mouthwatering ribs that will impress your family and friends. In this section, I will guide you through the step-by-step process of smoking ribs on a gas grill, from choosing the best types of ribs to serving them up with a delectable glaze.
Key Takeaways:
- Low and slow cooking is essential for smoking ribs to achieve that fall-off-the-bone tenderness.
- Using a leave-in thermometer helps you monitor the temperature of your gas grill for precise cooking.
- Wrapping the ribs in aluminum foil or butcher paper speeds up the cooking process and enhances tenderness.
- Adding wood chips or pellets in a smoking tube or foil packet imparts a rich smoky flavor to the ribs.
- Creating two zones of heat on the grill ensures indirect heat for the ribs and direct heat for the wood chips or pellets.
Types of Ribs for Smoking
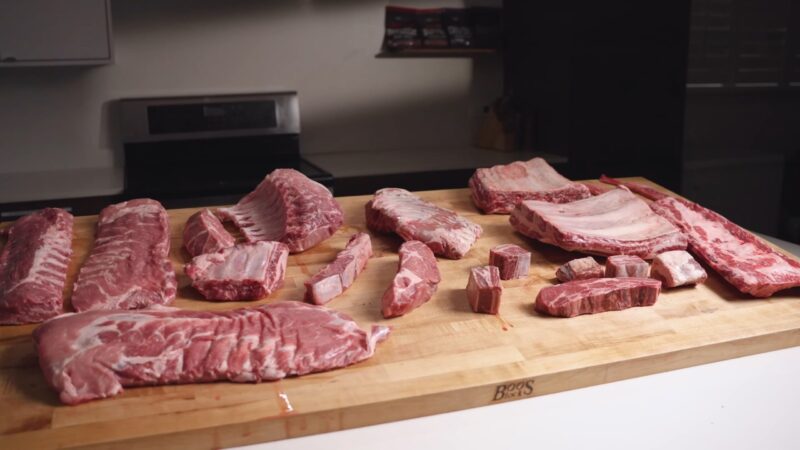
When it comes to smoking ribs, there are a few different options to consider, such as BBQ ribs, spare ribs, and baby back ribs. Each type has its own unique characteristics and flavors, making it important to choose the right one for your smoking adventure. Let’s take a closer look at these three popular choices:
BBQ Ribs
BBQ ribs, also known as St. Louis-style ribs, are a classic choice for smoking. These ribs come from the belly side of the pig and are typically meatier and fattier compared to other cuts. The extra fat content adds richness and flavor, making them a favorite among barbecue enthusiasts. BBQ ribs are known for their tender and juicy texture, and they are often coated in a tangy barbecue sauce for a mouthwatering finish.
Spare Ribs
Spare ribs are another popular option for smoking. These ribs come from the side or belly of the pig and are larger and meatier than baby back ribs. Spare ribs have a good amount of fat marbling, which helps keep them moist and flavorful during the smoking process. They have a slightly chewier texture compared to baby back ribs but offer a rich and intense pork flavor. Spare ribs can be cooked with or without the rib tips, depending on personal preference and recipe.
Baby Back Ribs
If you prefer leaner and more tender ribs, baby back ribs are a fantastic choice. These ribs come from the upper part of the pig’s ribcage and are smaller and shorter in size compared to spare ribs. Baby back ribs have less fat and connective tissue, which results in a more tender and delicate texture. They are known for their mild and sweet flavor, making them a favorite among those who enjoy a balance of meatiness and tenderness. Baby back ribs are often served with a simple dry rub or a light glaze to enhance their natural flavors.
When selecting ribs for smoking, consider your personal preference for meatiness, tenderness, and flavor. Whether you opt for BBQ ribs, spare ribs, or baby back ribs, the key to a successful smoked rib dish lies in the slow and gentle cooking process, allowing the flavors to develop and the meat to become tender and succulent.
Preparing the Ribs
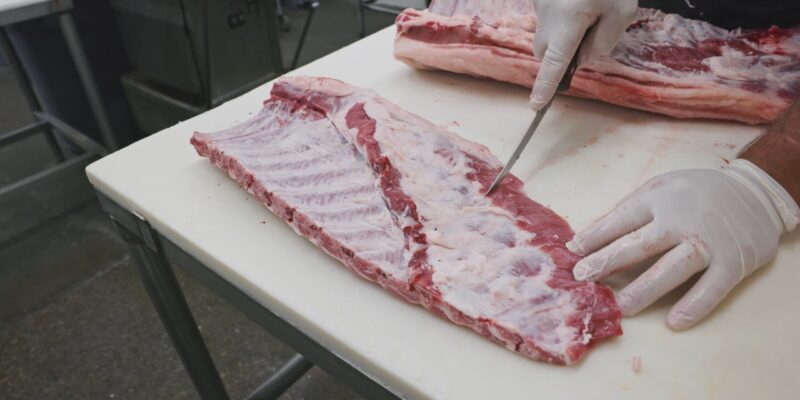
Before you start smoking your ribs, it’s crucial to prepare them with a delicious marinade or rub to enhance their flavor. This step is essential for infusing the meat with a burst of savory and mouthwatering taste. When it comes to marinades, you can choose from a variety of flavors such as sweet and tangy, spicy and bold, or even a combination of both. Experimenting with different marinade recipes can add a unique twist to your ribs and please your taste buds.
Alternatively, if you prefer a dry rub, you can create your own blend of herbs and spices to coat the ribs. From paprika and garlic powder to brown sugar and chili powder, the options are endless. The dry rub forms a flavorful crust on the exterior of the ribs as they cook, infusing every bite with a burst of aromatic goodness.
Marinade vs. Rub: Which is better?
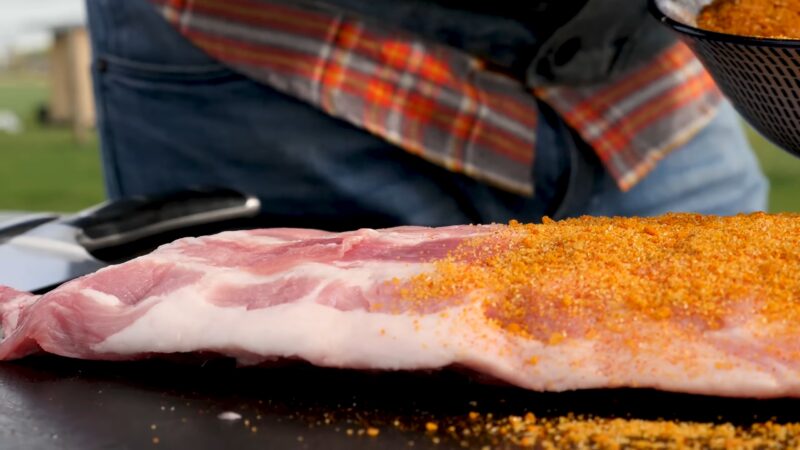
While both marinades and rubs can enhance the flavor of your ribs, it ultimately comes down to personal preference. Marinades work by breaking down the protein in the meat and allowing it to absorb the flavors, resulting in tender, juicy, and well-seasoned ribs. On the other hand, a rub forms a tasty crust on the surface of the meat, giving it a delightful texture and a concentrated burst of flavor.
| Marinade | Rub |
|---|---|
| Uses liquid-based ingredients | Consists of dry herbs and spices |
| Requires a longer marinating time, usually a few hours to overnight | Can be applied immediately before smoking, requiring less preparation time |
| Creates a moist and tender texture | Develops a flavorful crust on the ribs |
| Allows for a wide range of flavors and combinations | Offers a concentrated burst of flavor |
Regardless of your choice, make sure to apply the marinade or rub generously to the ribs, ensuring that every inch of the meat is covered. Allow the flavors to penetrate the meat by letting it marinate or rest with the rub on for a sufficient amount of time. This will result in ribs that are bursting with flavor from the inside out.
Setting up the Gas Grill for Smoking
To achieve the perfect smoky flavor when smoking ribs on a gas grill, it’s essential to properly set up your grill for indirect heat and smoke infusion. Here’s a step-by-step guide on how to do it:
- Start by cleaning your grill grates thoroughly to prevent any residue from affecting the flavor of your ribs.
- Next, remove the cooking grates and place a smoking tube or a foil packet filled with wood chips or pellets on the flavorizer bars or heat shields of your gas grill. These will provide the smoky flavor that makes smoked ribs so delicious.
- Now, turn on the gas grill and preheat it to around 225°F (107°C), making sure to ignite only one or two burners. This will create the indirect heat zone where your ribs will be placed. Position a drip pan beneath the cooking grates to catch the drippings and prevent flare-ups.
- Once the grill has reached the desired temperature, it’s time to put your ribs on. Carefully place them on the cooking grates opposite the lit burners, directly above the drip pan. This positioning ensures that the ribs cook slowly and evenly.
- Close the lid of your grill and let the ribs smoke for about 3.5 hours, maintaining a consistent temperature. You may need to periodically replenish the wood chips or pellets to maintain a steady flow of smoke.
Throughout the smoking process, it’s important to resist the temptation to constantly open the grill and check on the ribs. This can cause temperature fluctuations and prolong the cooking time. Instead, trust your leave-in thermometer to monitor the internal temperature of the meat, which should reach around 195°F (90°C) for tender and juicy ribs.
Ensuring Proper Ventilation
Adequate ventilation is crucial when smoking ribs on a gas grill. To ensure the proper flow of smoke, adjust the dampers or vents on your grill to maintain a steady airflow. This helps to prevent the buildup of stale smoke and allows the smoky flavor to infuse the ribs.
| Gas Grill Ventilation Tips: |
|---|
| Keep the top vent fully open to allow the smoke to escape. |
| Adjust the bottom vents to control the airflow and maintain the desired temperature. |
| Monitor the smoke coming out of the grill. Thin, blue smoke indicates proper combustion, while thick, white smoke can result in a bitter taste. |
By following these steps and creating the ideal setup for smoking ribs on a gas grill, you’ll be well on your way to savoring tender, flavorful ribs that will impress your family and friends at your next backyard cookout.
Smoking the Ribs
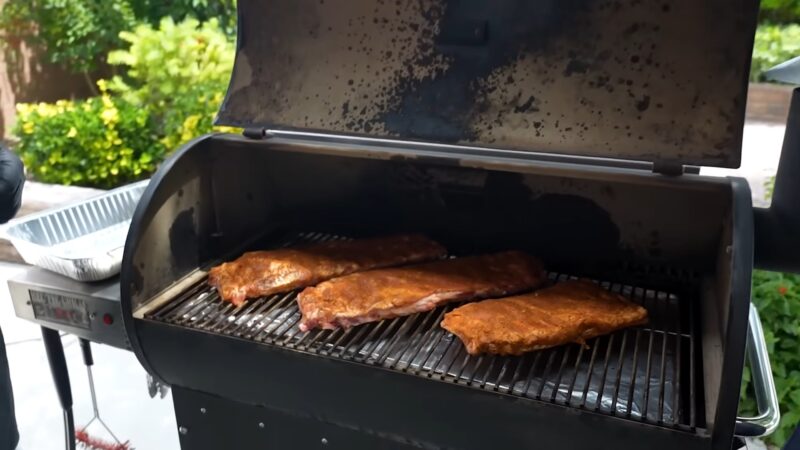
Now it’s time to start smoking the ribs on your gas grill, ensuring the low and slow cooking method is followed for maximum tenderness and flavor. Here are the steps to achieve mouth-watering smoked ribs:
1. Prepare the grill: Set up your gas grill for indirect cooking by preheating one side of the grill to medium-low heat (around 225°F or 107°C). Place a drip pan filled with water or apple juice on the heated side to help maintain moisture and catch any drippings. On the other side, place a smoking tube filled with wood chips or a foil packet with wood pellets to generate smoke.
2. Season the ribs: Apply your favorite dry rub or marinade to both sides of the ribs. Let them sit at room temperature for about 30 minutes to allow the flavors to penetrate the meat.
3. Place the ribs on the grill: Position the ribs bone-side down on the cooler side of the grill, away from direct heat. Close the grill lid and let the magic happen. Maintain a consistent temperature by adjusting the gas flow and periodically checking the thermometer.
4. Spritzing and mopping: Every hour, give the ribs a gentle spritz with a mixture of apple juice and vinegar. This helps to keep the meat moist and enhances the flavors. Remember, refrain from opening the grill too often to prevent heat loss.
5. Monitor the cooking time: The cooking time will vary depending on the thickness of the ribs. Typically, smoking ribs takes approximately 3.5 hours. Use a leave-in thermometer to check the internal temperature. The ribs are done when they reach around 203°F (95°C) and the meat easily pulls away from the bones.
6. Wrap and rest: Once the ribs reach the desired tenderness, carefully remove them from the grill and wrap them tightly in aluminum foil or butcher paper. This technique, known as the Texas crutch, helps to accelerate the cooking process and further tenderize the meat. Let the wrapped ribs rest for about 30 minutes to allow the flavors to settle.
Now you are ready to savor your perfectly smoked ribs! Unwrap them, brush with your favorite barbecue sauce, and place them back on the grill for a few minutes to set the glaze. Serve the ribs hot and enjoy the juicy, fall-off-the-bone goodness.
| Pro Tips | Do’s | Don’ts |
|---|---|---|
| • Use a smoking tube or foil packet to generate smoke | • Preheat the grill to the desired temperature before adding the ribs | • Don’t rush the cooking process; low and slow is the key |
| • Spritz the ribs every hour to keep them moist | • Monitor the grill temperature throughout the smoking process | • Don’t overcrowd the grill; leave enough space for proper air circulation |
| • Use a leave-in thermometer to check the internal temperature | • Let the ribs rest before serving to allow the flavors to settle | • Don’t keep opening the grill lid; it prolongs the cooking time |
Testing for Doneness
To ensure your smoked ribs are cooked to perfection, it’s important to know how to test them for doneness during the smoking process. There are a few key indicators to look out for to determine if your ribs are ready to be wrapped or considered done.
One of the first things to pay attention to is tenderness. The meat should have a slight give when gently squeezed with tongs or a fork. If it feels too firm, it needs more time to cook. On the other hand, if it feels too soft and falls apart easily, it may be overcooked. You want your ribs to be tender but still hold their shape.
Color is another important factor to consider. When smoking ribs, they should develop a beautiful mahogany or caramelized exterior. This is a sign that the sugars in the rub and marinade have caramelized and created a flavorful crust. If the ribs are pale or have a grayish color, they may need more time on the grill to develop that desired color and flavor.
Testing with the Bend Test
To determine if your ribs are done, you can also use the bend test. Hold the slab of ribs at one end with a pair of tongs and let the other end hang down. If the ribs bend easily and the meat starts to crack slightly on the surface, they are usually ready to be wrapped. However, if the ribs don’t bend as much or the meat doesn’t crack, they may need more time to cook.
| Bend Test Results | Doneness |
|---|---|
| Ribs bend easily and meat cracks | Ready to be wrapped |
| Ribs bend slightly with no meat cracking | Needs more time to cook |
Once you are satisfied with the tenderness and color of your smoked ribs, it’s time to remove them from the grill. You can wrap them in aluminum foil or butcher paper, which helps to retain moisture and speed up the cooking process. Let the wrapped ribs rest for about 30 minutes to allow the juices to redistribute and the flavors to meld together.
Now that you know how to test your smoked ribs for doneness, you can confidently cook them to perfection every time. Remember to adjust your cooking time based on personal preference and the specific characteristics of your gas grill. With practice and attention to detail, you’ll be serving up mouthwatering ribs that will impress your family and friends.
Wrapping the Ribs and Adding Sauce
Wrapping the ribs and adding barbecue sauce is the final step to perfecting your smoked ribs on the gas grill, giving them that signature moist and flavorful exterior. Once you have achieved the desired tenderness and color, it’s time to prepare the ribs for their finishing touch.
To wrap the ribs, start by laying out a large sheet of aluminum foil or butcher paper. Carefully transfer the ribs from the grill onto the foil or paper, bone-side down. This will help retain their juices and allow the flavors to meld together. Wrap the ribs tightly, creating a sealed packet that will further tenderize the meat and infuse it with the marinade and rub flavors.
While you can choose to wrap the ribs at any point during the smoking process, I recommend waiting until the meat has developed a desirable bark or crust on the surface. Typically, this occurs after the first 2 to 3 hours of smoking. The bark adds a delicious caramelized layer that complements the smoky flavor.
After wrapping the ribs, it’s time to add the barbecue sauce. Choose your favorite sauce or make your own, and generously brush it all over the ribs. The sauce will caramelize and create a sticky glaze as the ribs continue to cook. Be sure to cover both sides of the ribs for maximum flavor. Return the wrapped ribs to the grill for another 30 minutes to allow the sauce to set and further enhance the taste.
Once the ribs are done, carefully remove them from the grill and let them rest for a few minutes. This will allow the juices to redistribute and the flavors to intensify. When you’re ready to serve, unwrap the ribs and cut them into individual portions. The meat should be tender and moist, with a beautiful caramelized exterior. Serve the ribs hot, accompanied by extra barbecue sauce for dipping, and enjoy the delicious fruits of your labor.
Letting the Ribs Rest and Serving
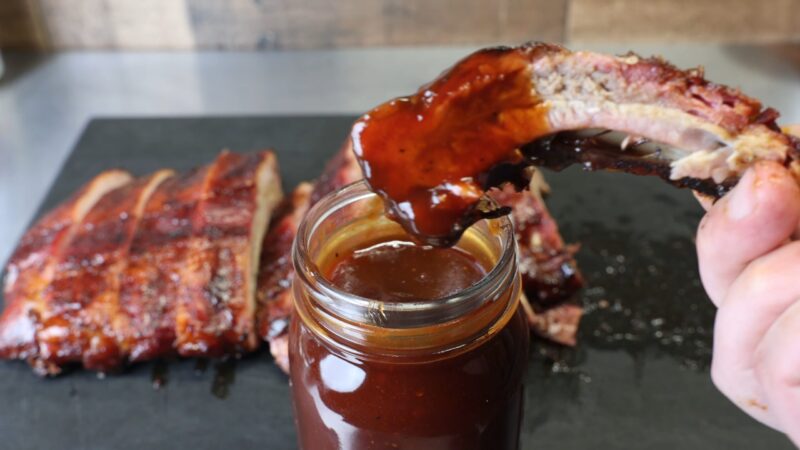
Once the smoked ribs are cooked to perfection, it’s crucial to let them rest for a while to allow the flavors to settle before serving and enjoying. This resting period is essential as it gives the meat time to reabsorb its juices and ensures a moist and tender bite every time.
When the cooking time is up and the ribs have reached the desired level of tenderness, carefully remove them from the gas grill using tongs or a sturdy spatula. Place them on a cutting board or a large platter and loosely cover them with aluminum foil. This covering will help retain heat and continue the cooking process while allowing the ribs to rest.
Let the ribs rest for at least 10-15 minutes, but if you have the time, it’s best to let them rest for 30 minutes to an hour. This resting period not only allows the meat to relax and reabsorb its juices, but it also makes it easier to handle and reduces the risk of burning your fingers or tongue.
When you’re ready to serve, remove the foil and admire the beautiful caramelized crust that has formed on the ribs. Cut the ribs into individual portions, using a sharp knife to separate the bones. Arrange them on a serving platter and garnish with fresh herbs or a sprinkle of your favorite barbecue rub for an extra touch of flavor.
| Resting Time: | 10-15 minutes (minimum), 30 minutes to 1 hour (recommended) |
|---|---|
| Serving Tip: | Brush on some additional barbecue sauce for an extra layer of flavor or serve with a side of tangy coleslaw and cornbread for a complete meal. |
Key Points:
- Resting the smoked ribs is important to allow the flavors to settle and the meat to reabsorb its juices.
- Loosely covering the ribs with foil helps retain heat and continue the cooking process during the resting period.
- Allowing the ribs to rest for at least 10-15 minutes, or preferably 30 minutes to an hour, makes them easier to handle and enhances tenderness.
- When serving, admire the caramelized crust, cut the ribs into individual portions, and garnish with fresh herbs or barbecue rub for added flavor.
With the ribs now expertly rested, it’s time to gather around the table, savor the smoky aroma, and indulge in the delightful flavors of your perfectly grilled ribs. Your efforts and patience have paid off, resulting in a mouthwatering dish that is sure to impress family and friends. Enjoy!
FAQ
Can I smoke ribs on a gas grill?
Yes, smoking ribs on a gas grill is possible and can produce delicious results.
How do I smoke ribs on a gas grill?
Smoking ribs on a gas grill involves low and slow cooking, using a leave-in thermometer to monitor temperature, and wrapping the ribs in aluminum foil or butcher paper to help them cook faster and tenderize.
How can I add smoke flavor to my ribs?
You can add smoke flavor to your ribs by adding wood chips or pellets in a smoking tube or foil packet on the grill.
What is the importance of creating two zones of heat on the grill?
Creating two zones of heat on the grill, with indirect heat for the ribs and direct heat for the wood chips or pellets, is essential for smoking ribs on a gas grill.
How often should I spritz the ribs while smoking?
It is recommended to spritz the ribs with a mixture of apple juice and vinegar every hour to help keep them moist during the smoking process.
How long does it take to smoke ribs on a gas grill?
The cooking time can vary, but typically ribs are smoked for about 3.5 hours.
Final Words
Smoking ribs on a gas grill introduces a unique and tantalizing flavor profile that stands apart from conventional smoking methods. While many barbecue enthusiasts typically use charcoal grills or dedicated smokers to achieve that classic smoky taste, a gas grill provides a more accessible and often more convenient option for many households.
It’s a testament to the versatility of gas grills and the endless culinary adventures they offer.
